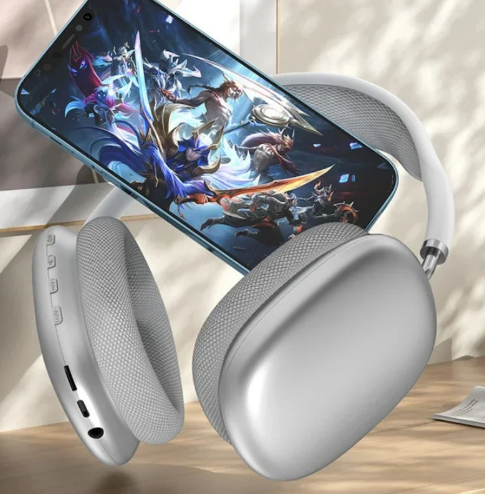
알아봅니다 ] p9 헤드셋 , AKA 차이팟맥스 블루투스연결, p9 pro max
작성자 정보
- 삼둡 작성
- 작성일
컨텐츠 정보
- 5,713 조회
- 목록
본문
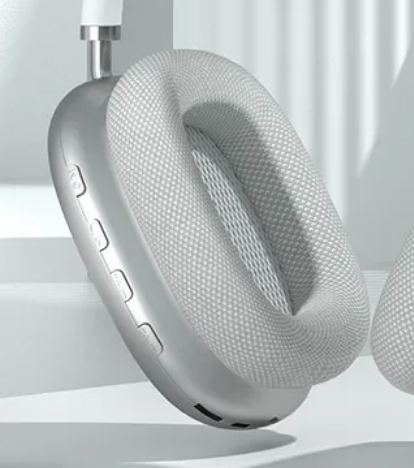
버튼이 네개 있습니다.
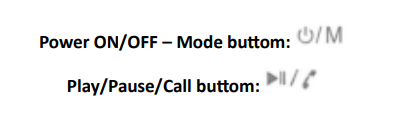
위의 두버튼은 위 그림과 같습니다.
1번 버튼으로 파워도 키고 블루투스 연결도 합니다.
1. 전원을 켭니다: "전원 켜기/끄기 - 모드" 버튼을 약 2초간 길게 누르면 음성이 들립니다:
"블루투스 모드"라는 음성이 들리면 파란색과 빨간색 표시등이 번갈아 깜박입니다.
2. 끄기: "전원 켜기/끄기 - 모드" 버튼을 약 3초간 길게 누르면 음성이 들립니다:
"전원 끄기"라는 음성이 들리면 표시등이 꺼집니다.
3. 페어링: 전원을 켠 후 검색 상태를 입력하고 제품 모델을 찾으면 다음과 같은 음성이 들립니다.
음성 "블루투스 모드", 파란색과 빨간색 표시등이 번갈아 깜박입니다.
4. 페어링 성공: "딩동"이라는 음성이 들리고 파란색 표시등이 켜집니다.
5. 연결 해제: "동"이라는 음성이 들리고 파란색과 빨간색 표시등이 번갈아 깜박입니다.
6. LED 조명 켜기/끄기: "재생/일시정지/통화" 버튼을 세 번 클릭하거나 길게 누르면 LED 표시등(
이 표시등으로 켜지거나 꺼집니다.
7. 자동 페어링: 전원을 켜면 자동 페어링되면 "딩동"이라는 음성이 들립니다.
음성이 들리고 파란색 표시등이 켜집니다.
8. 거리에서 분리: (헤드폰이 페어링 상태로 들어가고 파란색 및 빨간색 표시등이 깜박입니다.
또는 몇 분 안에 작동 범위로 이동하면 헤드폰이 자동으로 연결됩니다,
또는 연결되지 않은 상태에서 5분이 지나면 자동으로 꺼지고 "딩
동"이라는 음성이 들리고 파란색 표시등이 켜집니다.
9. 볼륨 조절하기: 버튼을 길게 누릅니다: "V+ / V-"; 최대 / 최소 볼륨: "DD".
10. 이전 트랙: 버튼을 짧게 누릅니다: "V-".
11. 다음 트랙: 버튼을 짧게 누릅니다: "V+"
12. 재생/일시 정지: "재생/일시정지/통화" 버튼을 짧게 누릅니다.
13. 수신 전화 표시: 소리가 들립니다: 링 링.
14. 전화 자동 응답기: "재생/일시정지/통화" 버튼을 짧게 누릅니다.
15. 통화 거절하기: "재생/일시정지/통화" 버튼을 길게 누릅니다.
16. 마지막 번호로 재다이얼하기: "재생/일시정지/통화" 버튼을 두 번 클릭합니다.
17. 전화 끊기: "재생/일시정지/통화" 버튼을 짧게 누릅니다.
18. 배터리 부족 표시: 배터리 전압이 3.3V 미만이면 음성 안내 메시지가 들립니다:
"충전하세요".
19. 저전력/전원 끄기: 배터리 전압이 3.1V보다 낮으면 "전원 끄기"라는 음성이 들립니다:
"전원 끄기".
20. 충전 표시등: 충전 중 빨간색 표시등이 켜집니다.
21. AUX IN: 헤드폰의 한 쪽 플러그와 오디오 장치의 다른 플러그를 연결하면 다음과 같은 음성이 들립니다.
음성: "전원 끄기"라는 소리가 들리고 표시등이 꺼집니다.
22. 충전 완료: 충전이 완료되면 빨간색 표시등이 꺼집니다.
FM 모드: "전원 켜기/끄기 - 모드" 버튼을 한 번 클릭하면 음성이 들립니다: FM 모드입니다.
24. 자동 방송국 검색: "재생/일시정지/통화" 버튼을 두 번 클릭하면 파란색 표시등이 깜박입니다.
1. Power on: Long press the "Power ON/OFF - Mode" button for about 2s, you will hear the voice:
"bluetooth mode", the blue and red lights will blink alternately.
2. Off: Long press the "Power ON/OFF - Mode" button for about 3s, you will hear the voice:
"Power OFF", the lights will turn off.
3. Pairing: Enter the search status after power on and find the product model, you will hear the
voice "bluetooth mode", blue and red lights will flash alternately.
4. Successful pairing: you will hear the voice " Ding Dong" and the blue light will light up.
5. Disconnect: you will hear the voice " Dong " and the blue and red lights will flash alternately.
6. Turn on/off LED light: Three clicks or long press on the "Play/Pause/Call" button / LED light
turns on or off as indicator.
7. Automatic pairing: Automatic pairing when power on, you will hear the voice: "Ding Dong"
and the blue light will turn on.
8. Disconnect out of distance: (headphones enter into pairing status, blue and red lights flash
alternately, headphones will automatically connect if move to working range in a few minutes,
or automatically turn off after 5 minutes without connection; you will hear the voice: "Ding
Dong" and the blue light will turn on.
9. Volume adjustment: Long press to buttons: "V+ / V-" ; Max/min volume: "DD".
10. Previous track: Short press to the button: "V-".
11. Next track: Short press on the button: "V+"
12. Play/pause: Short press on the "Play/Pause/Call" button .
13. Incoming call indication: You will hear a sound: Ling Ling.
14. Call answering machine: Short press on the "Play/Pause/Call" button.
15. Reject call: Long press on the "Play/Pause/Call" button.
16. Redial the last number: Double-click on the "Play/Pause/Call" button.
17. Hang up calls: Short press on the "Play/Pause/Call" button.
18. Low battery indication: If the battery voltage is below 3.3 V., you will hear a voice prompting:
"please charge".
19. Low Power / Power Off: If the battery voltage is lower than 3.1V, you will hear a voice saying:
"Power Off".
20. Charging indicator: Red light on during charging.
21. AUX IN: One plug on the headphones, another plug on the audio devices, you will hear the
voice: "Power Off" and the indicator light will turn off.
22. Charge complete: Once charging is complete, the red light will turn off.
FM Mode: One click on the "Power ON/OFF - Mode" button, you will hear the voice: FM mode.
24. Auto station scan: Double click the "Play/Pause/Call" button / the blue light will flash.
25. SD ca
관련자료
-
이전
-
다음