우분투에 그누보드를 설치해보자. 개인계정에서의 php실행여부 모든 것이 여기에 담겨있다. Let's install Gnuboard on Ubuntu. Whether PHP is implemented in a personal account or not, everything is contained here.
작성자 정보
- 삼둡 작성
- 작성일
컨텐츠 정보
- 11,393 조회
- 목록
본문
일단 apm이 설치되어 있는 상태라 생각하고 그 이후의 작업들을 정리해본다.
I think the current state is that APM is installed. Summarize your work after that.


위와 같이 apm 은 잘 인스톨되어 있다.
안되어있으면 아래와 같이 설치한다.
As mentioned above, apm is well installed.
If not, install as below.
sudo apt install apache2
sudo apt install mysql
sudo apt install php libapache2-mod-php php-mysql
위의 라인들의 폴더명처럼 적당한 폴더(~/public_html/bbs)를 만들고 그누보드를 다운로드한다.
Create a suitable folder like the folder name of the lines above(~/public_html/bbs) and download the gnu board.
wget https://github.com/gnuboard/gnuboard5/archive/refs/tags/v5.5.8.2.5.tar.gz
tar xvzf 파일명을 입력해서 압축을 푼다.
Enter the tar xvzf file name to extract it.

mysql에 루트권한으로 root@mysql로 접속한다.
사용자와 db를 만들고 권한을 줘야하기 때문이다.
I connect to root@mysql with root authority.
This is because you need to create and authorize the user and db.
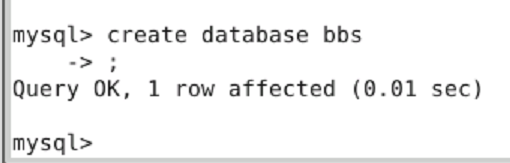
개인 서버이니 루트로 다할까 한다.
개인 서버가 아니라면
root@mysql로 mysql접속한 이후에
계정을 추가하고 쓰기 읽기 권한을 추가해야한다.
Since it's a private server, I'm thinking of doing it all as a root
Unless it's a private server
After connecting to mysql with root@mysql,
You need to add an account and add write read permissions.
create user '아이디'@'localhost' identified by '비밀번호';
grant all privileges on *.* to '아이디'@'%' with grant option;
grant select, insert, update, delete, create, drop, alter on DB명.* to '아이디'@'localhost';
flush privileges;
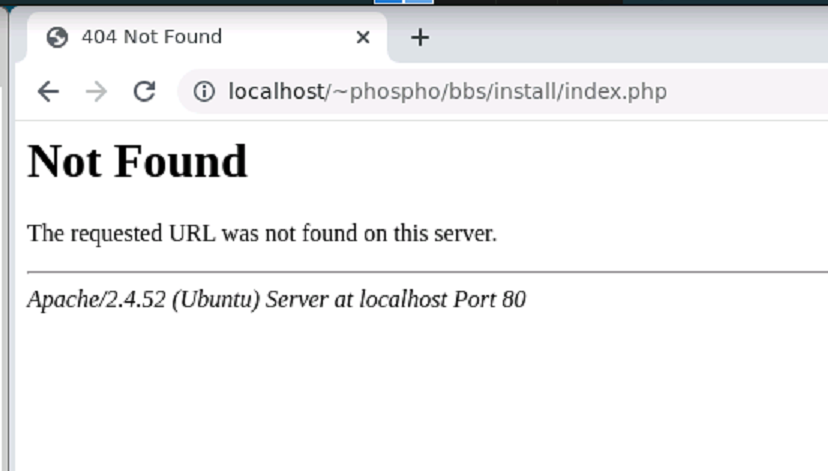
개인 계정에 접근해서 설치하려고 했는데 안된다.
I tried to access and install my personal account, but it doesn't work.

아파치 세팅을 너무 오랜만에 해서 grep으로 검색해보니 userdir.conf가 뜬다.
If you search for grep for too long, userdir.conf will appear.

잘 되어있는거 같은데.
이게 반영을 되게 해야하는 것이다.
available에서 enable로 옮겨 줘야한다.
I think it's done well.
This is what needs to be reflected.
You have to move it from available to enable.

root@ubi:/etc/apache2/mods-enabled# ln -s ../mods-available/userdir.conf
root@ubi:/etc/apache2/mods-enabled# ln -s ../mods-available/userdir.load

# service apache2 restart
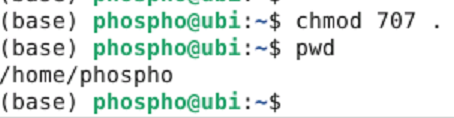
$ chmod 707 install

웁스! php가 실행이 안되고 소스가 바로 나온다.
Oops! PHP does not run and the source is output

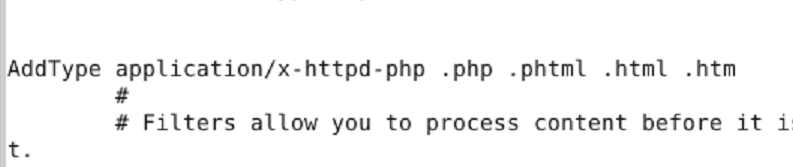
AddType application/x-httpd-php .php .phtml .html .htm
이것도 안되어서 다음을 추가했다.
This didn't work either, so I added:
$ sudo vi /etc/php/8.1/apache2/php.ini
short_open_tag = On
이 부분 수정 Modify this part

그래도 안된다.
I still can't.
하나하나 체크해보겠다.
I'll check them one by one.
아파치에서 php모듈이 로드되었는가 확인한다.
In Apache, whether the php module was loaded or not confirms.

난 잘 되어있지만, 그냥 해 보았다.
I'm fine, but I just tried it.
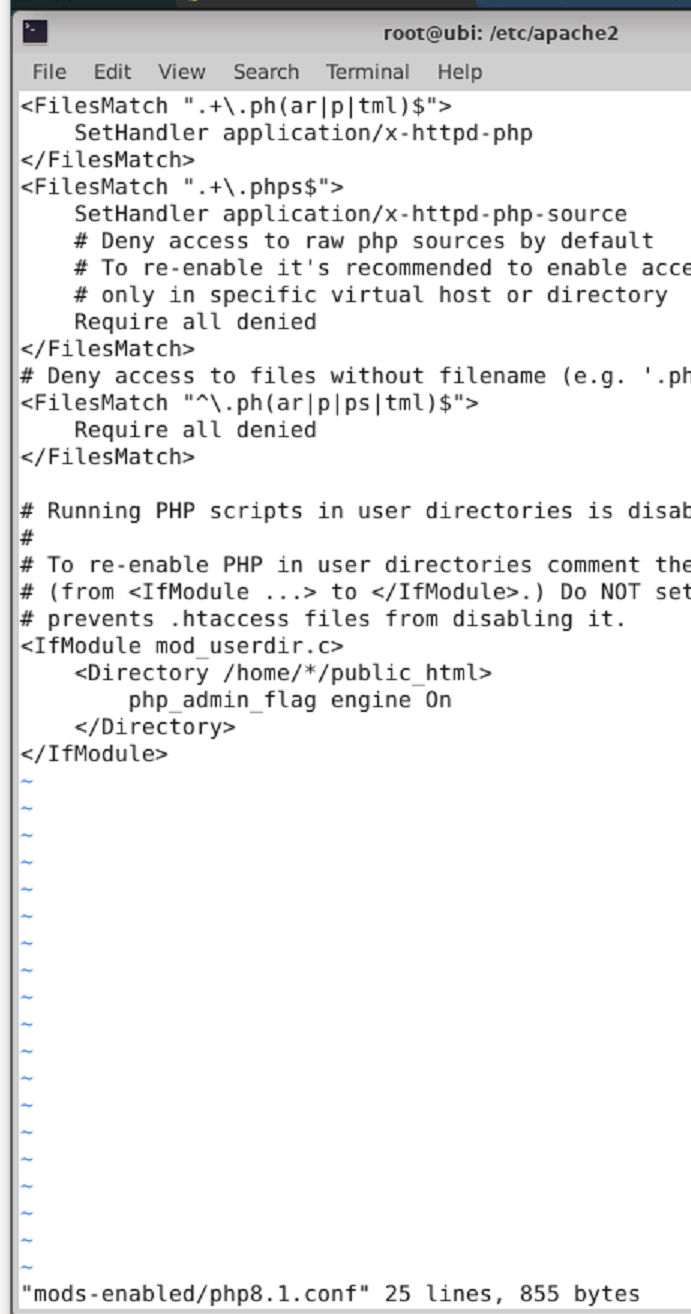
mods-enabled/php8.1.conf 에서 engine off를 on으로 수정했다.
In the mods-enabled/php8.1.conf, you modified the engine off to on.


/etc/apache2/sites-enabled/000-default.conf 수정 VirtualHost 바깥에 아래 내용을 위 사진처럼 추가했다.
Alias /public_html /home/*/public_html
<Directory /home/*/public_html>
Options FollowSymLinks
#DirectoryIndex index.php
AllowOverride All
</Directory>
개인계정에서의 php실행의 모든 것이 여기에 담겨있다고 해도 과언이 아니다.
It is no exaggeration to say that everything about PHP execution in a personal account is contained here.
gd라이브러리를 설치해야만, 썸네일 등의 기능이 완전하다고 해서 설치해본다.
You have to install the gd library, and the functions such as thumbnails are complete, so try to install it.
sudo apt-get install php8.1-gd

$ sudo service apache2 restart
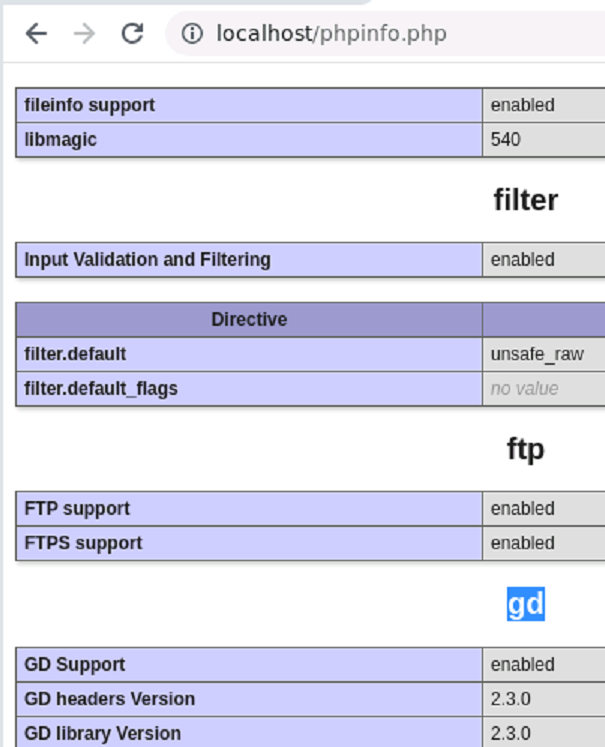
phpinfo에서 gd가 가능한지 체크해본다.
Check if gd is possible in phpinfo.

출처 : Access denied for user 'root@'@'localhost' 해결방법 :: oziguyo (tistory.com)
해보니 더욱 문제가 생겼다.
I tried it, and it got even more problematic.

mysql을 완전삭제하고 재설치하고자한다.
I want to completely delete and reinstall mysql.
Ubuntu에서 Mysql 완전 삭제
sudo apt-get remove --purge mysql*
mysql 관련 파일들 리스트 확인
dpkg -l | grep mysql
위 커맨드로 확인한 mysql 관련 파일 삭제
sudo apt-get remove --purge 파일명
폴더 및 관련항목 삭제
sudo rm -rf /etc/mysql /var/lib/mysql
sudo rm -rf /var/log/mysql
sudo rm -rf /var/log/mysql.*
sudo rm /var/lib/dpkg/info/*
sudo apt-get autoremove
sudo apt-get autoclean
재설치
apt-get install mysql-server --fix-missing --fix-broken ㅊ출처 : [Ubuntu] Mysql 완전 삭제, 재설치 (2vup.com)
... Failed! error: SET PASSWORD has no significance for user 'root'@'localhost' as the authentication method used doesn't store authentication data in the MySQL server. Please consider using ALTER USER instead if you want to change authentication parameters.
secure_installation에서 비밀번호를 설정하면 root 권한이 아닌 상태로 비밀번호를 설정했기 때문에 root 권한으로 비밀번호를 설정하라는 뜻입니다.(설정을 하라는대로 했으면 되야 하는 거 아니니??)
이게 웃긴 상황인데 secure_installation 에서 비밀번호를 설정하면 root 권한이 아니라서 아무리 비밀번호를 설정해도 root 비밀번호 설정을 하는게 아니라서 꼬여버립니다. root 권한으로 들어가지도 못하면서 secure_installation에서 root 비밀번호를 설정하라는 말도 안되는 설정 때문에 생기는 오류입니다. 속지마시고 mysql을 켜서 root 비밀번호를 직접 설정합니다. 다음과 같이 해서 해결합니다.
1. 해당 터미널 창을 꺼서 mysql_secure_installation 을 꺼버립니다.(열려있으면 root로 인지 하지 않음)
Turn off the mysql_secure_installation by turning off the appropriate terminal window. (If it is open, it is not recognized as root)
2. 다시 터미널 창을 켠 후 sudo mysql을 입력해 mysql에 들어갑니다.
Turn on the terminal window again and enter sudo mysql to enter mysql.
3. 다음과 같이 해서 비밀번호를 변경합니다. 비밀번호를 만들때에도 비밀번호 정책에 맞게 해주어야 합니다. 대소문자, 숫자, 특수문자를 섞어 넣어서 8자이상으로 만들어야 합니다.
And then you change the password, and when you create a password, you have to make sure that it's in line with your password policy, and you have to make it more than eight characters in a mixture of case, numbers, and special characters.
ALTER USER 'root'@'localhost' IDENTIFIED WITH mysql_native_password by'새로운비밀번호';
비밀번호 수준은 다음과 같습니다.
0 = LOW, 1= MEDIUM, 2=STRONG
- LOW : 8자 이상
- MEDIUM : 숫자, 대소문자 섞은 글자, 특수문자 섞어 8자 이상
- STRONG : 숫자, 대소문자, 특수문자, 사전에 없는 단어
만들고자 하는 비밀번호의 수준을 선택한 후 비밀번호를 입력합니다.
비밀번호를 입력하면 stong password 수준을 얘기해줍니다.
잘 되었다면 Query OK 가 나옵니다.
4. mysql을 나온후 다시 mysql_secure_installation을 켜서 설정을 진행합니다. 비밀번호 입력하고 들어가면 비밀번호를 바꿀지를 물어보는데 n을 눌러 다음 스텝으로 넘어가시기 바랍니다.
Y를 누르면 다시 비밀번호를 설정하는 란으로 바뀌고 비밀번호를 바꾸면 다시 오류가 나와면서 무한반복이 됩니다. 위 과정을 처음부터 다시 해야합니다.
After exiting mysql, turn on the mysql_secure_installation again to proceed with the setup. When you enter your password, you will be asked if you want to change your password, but press n to proceed to the next step.
If you press Y, it changes to the password setting field again, and if you change the password, an error appears again and repeats indefinitely. You have to do the above process all over again.
출처 : Mysql root 비밀번호 setup error(mysql secure installation) (tistory.com)
이로서 mysql과 php설정을 마쳤다.
그누보드는 install/index.php에서 정상적으로 값을 입력하면 잘 설치될 것이다.
After several steps, I finished configuring MySQL and PHP.
Gnuboard should install fine if you enter the values normally in install/index.php.

관련자료
-
이전
-
다음


