오라클클라우드에 우분투 서버를 만들어 접속하고, apm을 설치해보자. Create a Ubuntu server in Oracle Cloud and connect and install APM.
작성자 정보
- 삼둡 작성
- 작성일
컨텐츠 정보
- 6,958 조회
- 1 댓글
- 목록
본문
오라클 클라우드의 가입 및 인스턴스 셋팅은 다른 게시물을 통해서 알아보기로 한다.
The subscription and instance settings of the Oracle cloud will be recognized through other posts.
간단하게 apache2부터 설치해본다.
Simply install Apache2.
sudo apt-get install apache2

웹브라우저로 접속해보니 방화벽 설정이 안되어서 열리지를 않는다.
It doesn't open because it doesn't have a firewall setting.

오라클 클라우드에서 VNIC에서의 수신규칙을 추가한다.
Add a listening rule from a VNIC in Oracle Cloud.
서버내에서의 방화벽도 다음과 같이 열어준다.
The firewall in the server also opens as follows.
sudo iptables -I INPUT 5 -i ens3 -p tcp --dport 80 -m state --state NEW,ESTABLISHED -j ACCEPT
sudo iptables -I INPUT 5 -i ens3 -p tcp --dport 443 -m state --state NEW,ESTABLISHED -j ACCEPT

두가지 방화벽 설정을 했더니 잘 뜬다.
I set up two firewalls and it worked fine.
$ sudo apt-get install mysql-server
다음으로 mysql을 설치한다.
Next, install MySQL.
Next, enter as follows
그 다음으로는 아래와 같이 입력한다.
$ sudo mysql_secure_installation
지난번에 이렇게 바뀐 것을 몰라서 여러번 재설치 한 적이 있다.
I didn't know that this changed last time, so I reinstalled it several times.


대략 위와 같이 답을 적으면 설치가 완성된다.
Approximately, if you write the answer as above, the installation is completed.
ALTER USER 'root'@'localhost' IDENTIFIED WITH mysql_native_password by '새로운비밀번호';
도중에 에러가 나거나 설정이 잘못되어 root암호가 설정이 잘 안되면, 터미널에서 mysql에 접속해 위와 같은 명령어로 패스워드를 입력한다.
If an error occurs on the way or the root password is not set up properly due to an incorrect setting, connect to mysql at the terminal and enter the password with the above command.
이것도 잘 안된다면, validate-password 정책이 잘못된 것이니, 다음과 같은 작업이 필요하다.
If this does not work well, the validate-password policy is wrong, and the following work is needed.
mysql> show variables like 'validate_password%';
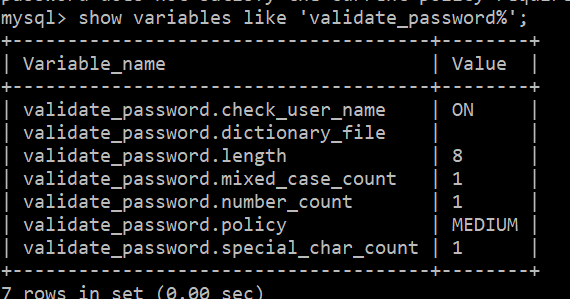
위와 같이 medium 이상의 정책을 정하면 패스워드를 선택하기 어려워진다.
If you set a medium or higher policy as above, it becomes difficult to select a password.
mysql> set global validate_password.policy=LOW;
위와 같은 명령어로 정책의 레벨을 낮추기를 권고한다.
It is recommended to lower the level of the policy with the above command.
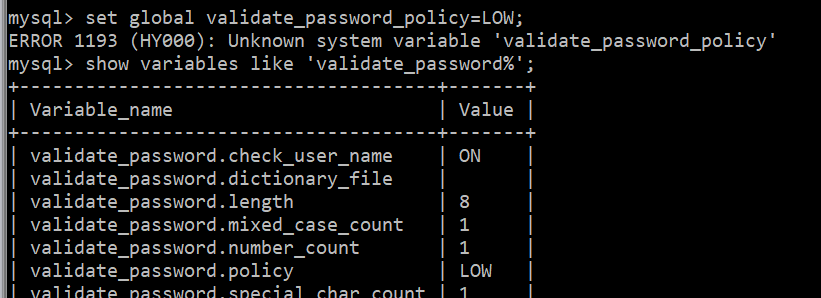
validate_password_policy(old version) validate_password.policy (mysql 8이상)
위의 방화벽 정책을 재부팅 후에도 유지하기 위해서 몇가지 프로그램을 설치한다.
Install some programs to maintain the firewall policy above after rebooting.
sudo apt-get install iptables-persistent
sudo netfilter-persistent save
sudo netfilter-persistent start

sudo apt install php php-mysql
이제 php를 설치한다.
Now install PHP.

phpinfo.php를 만들어서 웹에 접속하니 잘 작동된다.
It works well by creating phpinfo.php and connecting to the web.

관련자료
-
이전
-
다음
삼둡님의 댓글
- 삼둡
- 작성일
#netfilter-persistent start
이걸 해야겠는데


