우분투에 xrdp를 설치해서 원격데스크톱을 이용해보자 Let's use a remote desktop by installing xrdp on Ubuntu.
작성자 정보
- 삼둡 작성
- 작성일
컨텐츠 정보
- 8,064 조회
- 목록
본문
Ubuntu 20.04에 Xrdp를 설치하는 방법 (linux-console.net)
위 출처를 보고 따라해봅니다.
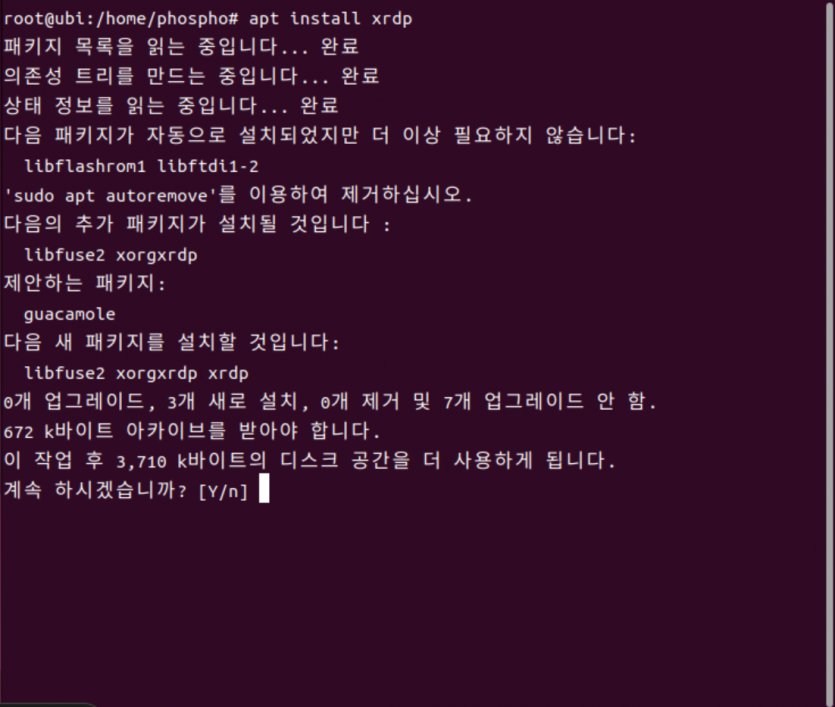
$ sudo apt install xrdp
apt를 이용해서 편하게 설치해본다.
Install XRDP comfortably using the apt
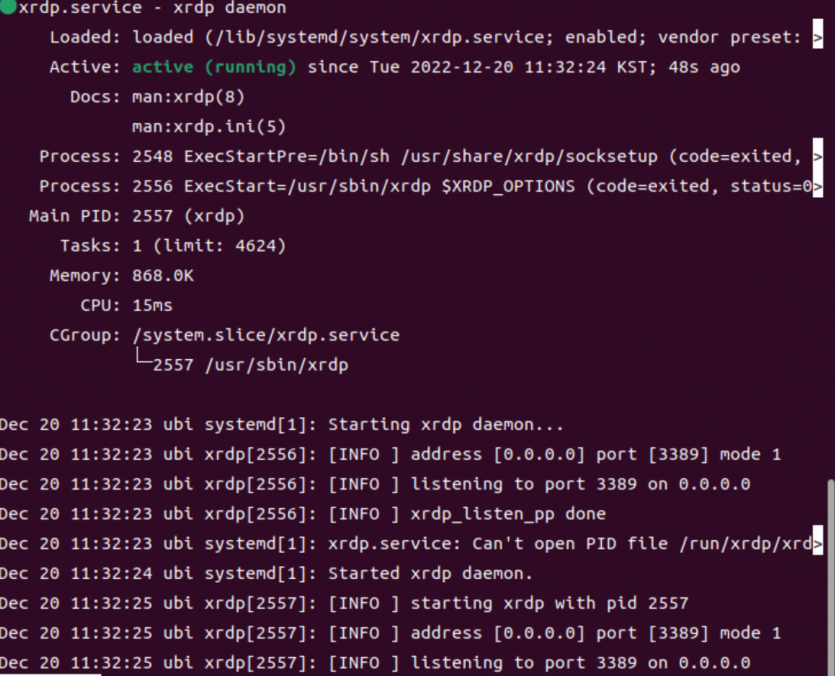
$ sudo systemctl status xrdp
xrdp서비스 상태를 확인해본다. 잘 실행되고 있다.
Check the status of the XRDP service. It's running well.
Xrdp가 설치되면 SSL 인증서 키 (ssl-cert-snakeoil.key)가/etc/ssl/private/폴더에 저장됩니다. "사용자가 파일을 읽을 수 있도록 xrdp 사용자를 ssl-cert 그룹에 추가해야합니다.
When Xrdp is installed, the SSL certificate key (ssl-cert-snakeoil.key) is stored in /etc/ssl/private/folder: "You must add xrdp users to the ssl-cert group so that the user can read the file.
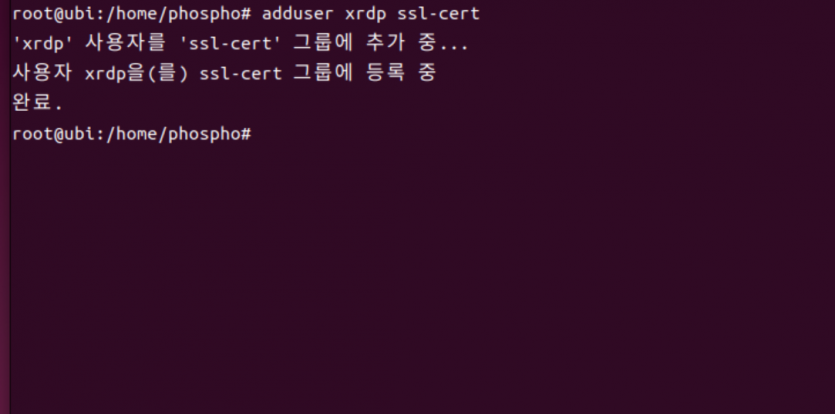
$ sudo adduser xrdp ssl-cert
Xrdp는 포트 3389에서 수신 대기하며 UFW 방화벽 뒤에있는 경우 포트를 열어 RDP 클라이언트의 인바운드 트래픽을 허용해야합니다. 이 예에서는 전체 서브넷에서 Ubuntu 시스템으로의 트래픽을 허용합니다.
Xrdp listens on port 3389, and if it is behind the UFW firewall, the port must be opened to allow inbound traffic from the RDP client; this example allows traffic from the entire subnet to the Ubuntu system.
$ sudo ufw allow from 192.168.2.0/24 to any port 3389
그런 다음 방화벽을 다시로드하고 포트가 열려 있는지 확인합니다.
Then reload the firewall and check if the port is open.
$ sudo ufw reload
$ sudo ufw status
위 과정에서 hyper V의 이더넷이 독특한 subnet을 가지고 있어서 체크해볼게 있었다.
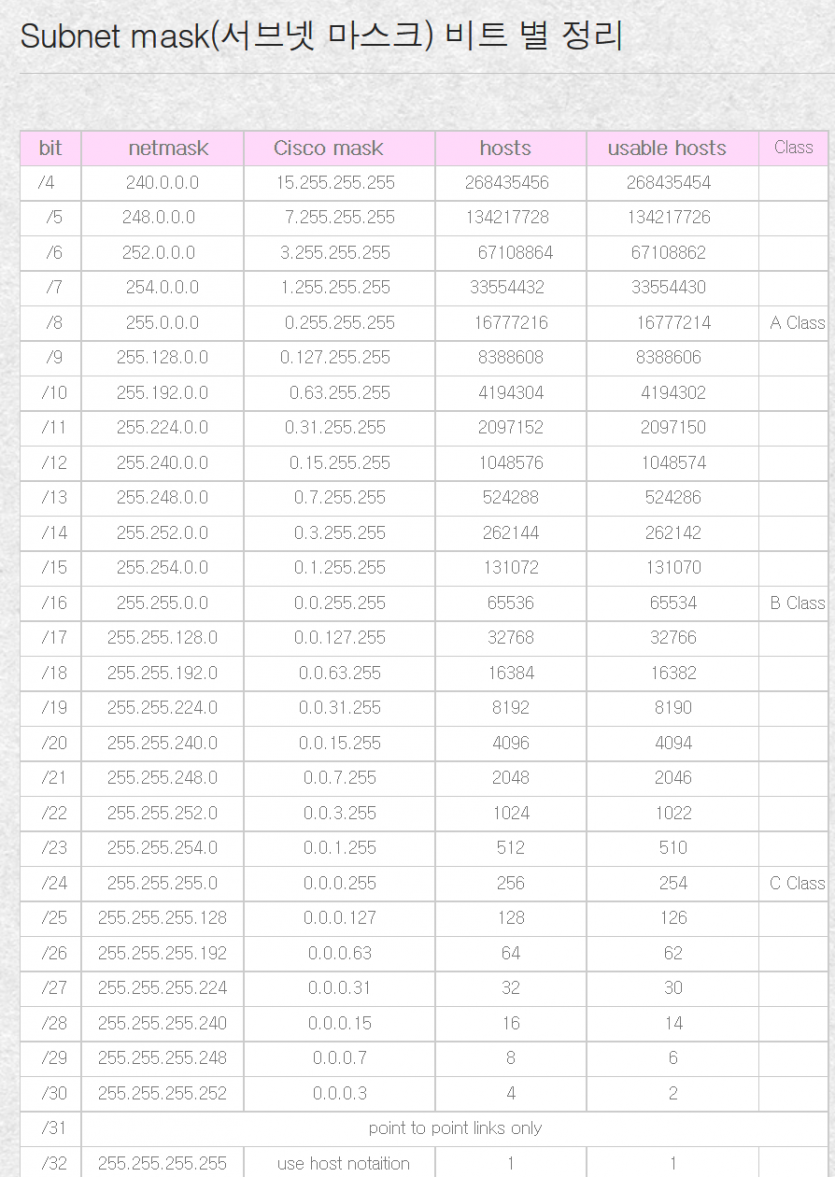
출처 참새느님이 짹짹거리고 있습니다. :: Subnet mask(서브넷 마스크) 비트 별 정리 (tistory.com)
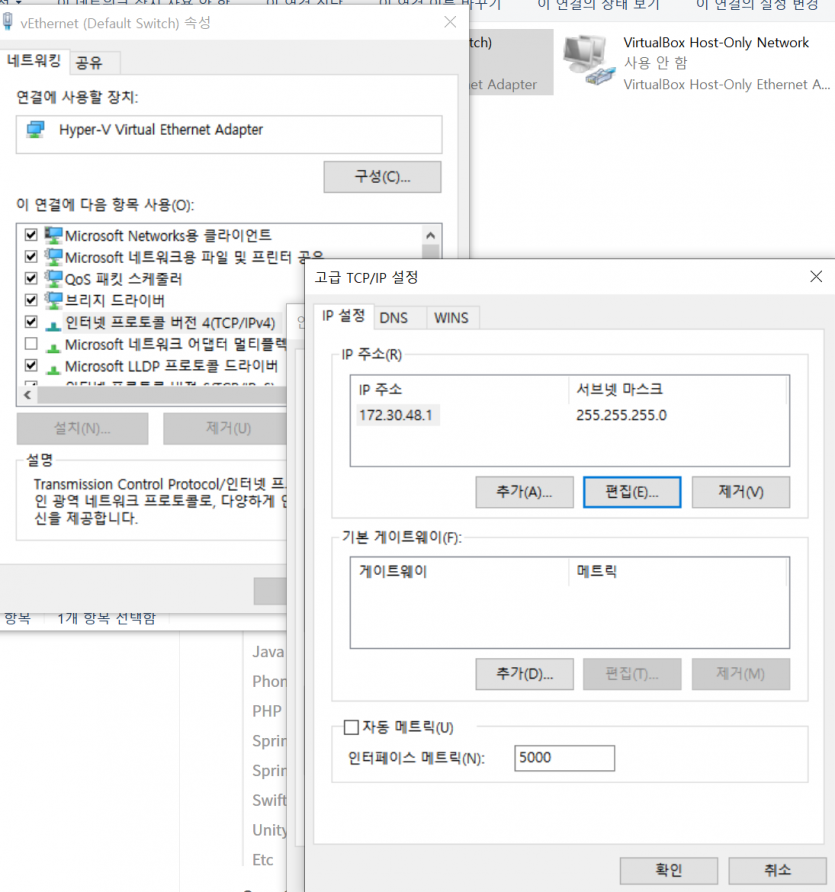
서브넷마스크를 255.255.254.0에서 255.255.255.0으로 변경했다.
The subnet mask was changed from 255.255.254.0 to 255.255.255.0.
이거 하다 망해서 다시 되돌렸다.
I messed up while doing this, so I turned it back.
그래서, hyper V의 내부망을 바꿔보고자 한다.
So, I want to change the internal network of hyperV.
Nat network settings (in hyper V) > 자유게시판 | 모든 정보가 이곳에 (haniw.com)
이와 같이해서 잘 잡아보았다.
Nat network settings (in hyper V) > Free Bulletin | All information here (haniw.com)
Like this, I caught it well.
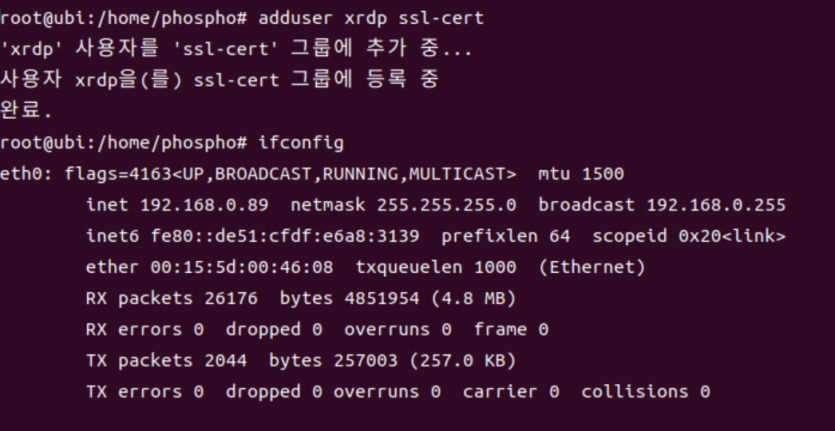
ifconfig 화면
hyper-V에서 네트워크브릿지로 가상네트워크를 만들고나서, hyper-V의 우분투에 적용했다.
ifconfig screen
After creating a virtual network from hyper-V to network bridge, we applied it to hyper-V Ubuntu.
$ sudo ufw allow from 192.168.0.0/24 to any port 3389

192.168.0.1~254의 ip대역을 갖고 있으면 위와같이, 방화벽의 포트를 열어준다.
If you have an ip band of 192.168.0.1 ~ 254, open the port of the firewall as above.
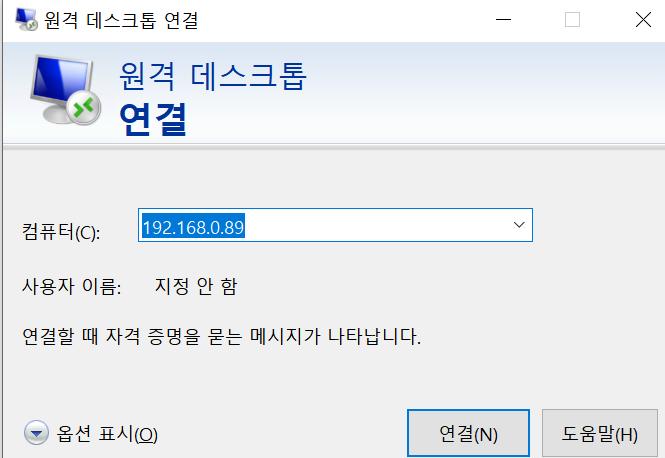
원격데스크톱으로 연결한다.
Connect to Remote Desktop.
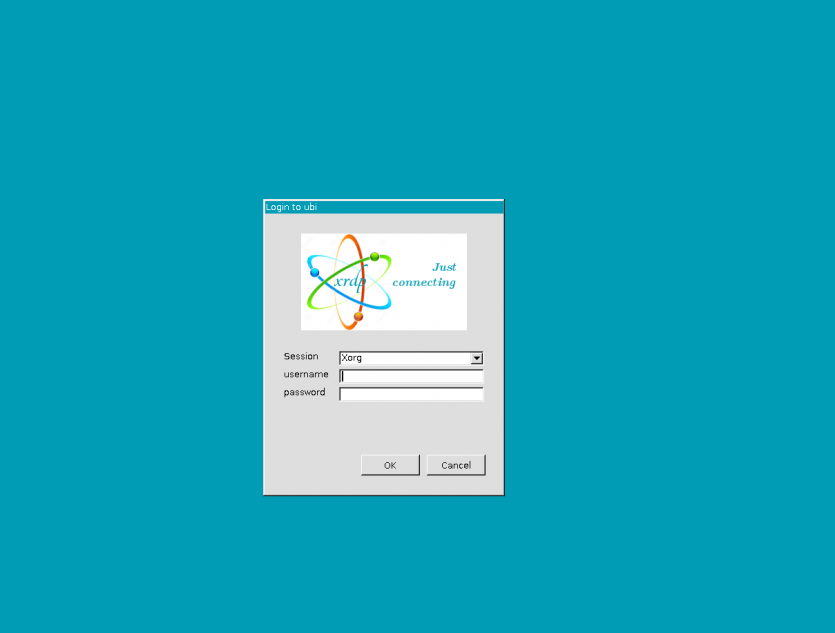
Ubuntu 바탕 화면 배경 대신 검은 색 빈 화면이 나타날 수 있습니다. 사실 개인적으로 만났고 파헤쳐 본 후 멋진 해결 방법을 발견했습니다.
해결책은 아주 간단합니다. 원격 시스템으로 이동하여 /etc/xrdp/startwm.sh 스크립트를 편집하십시오.
$ sudo vim /etc/xrdp/startwm.sh
Instead of an Ubuntu desktop background, a black blank screen might appear, in fact, after meeting and digging through it personally, I found a wonderful workaround.
The solution is quite simple: go to the remote system and edit the /etc/xrdp/startwm.sh script.
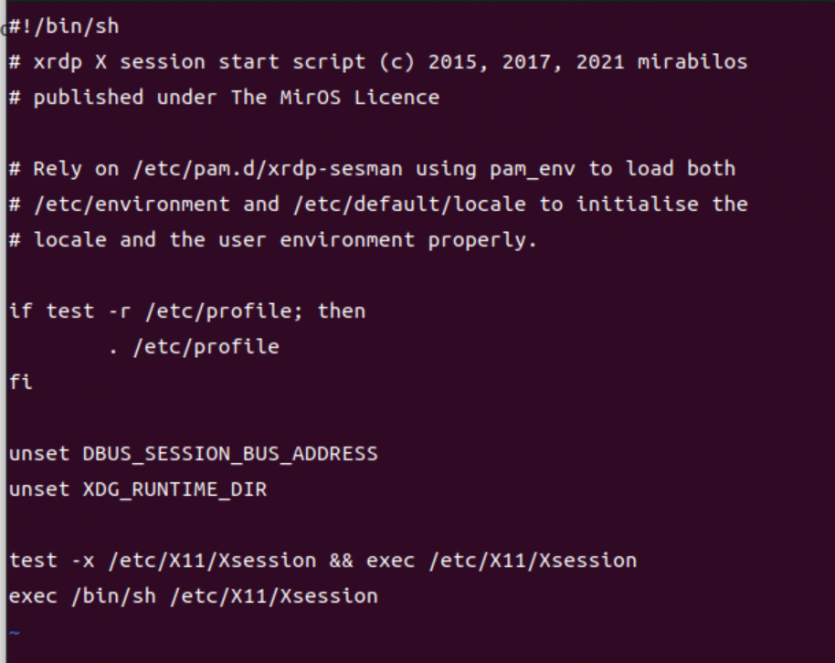
중간에 아래 두줄을 추가한 것이다.
unset DBUS_SESSION_BUS_ADDRESS
unset XDG_RUNTIME_DIR
그래도 빈화면이 떠서 아래 내용을 startwm.sh에 추가해보았다.
if test -r /etc/default/locale; then
. /etc/default/locale
test -z "${LANG+x}" || export LANG
test -z "${LANGUAGE+x}" || export LANGUAGE
test -z "${LC_ADDRESS+x}" || export LC_ADDRESS
test -z "${LC_ALL+x}" || export LC_ALL
test -z "${LC_COLLATE+x}" || export LC_COLLATE
test -z "${LC_CTYPE+x}" || export LC_CTYPE
test -z "${LC_IDENTIFICATION+x}" || export LC_IDENTIFICATION
test -z "${LC_MEASUREMENT+x}" || export LC_MEASUREMENT
test -z "${LC_MESSAGES+x}" || export LC_MESSAGES
test -z "${LC_MONETARY+x}" || export LC_MONETARY
test -z "${LC_NAME+x}" || export LC_NAME
test -z "${LC_NUMERIC+x}" || export LC_NUMERIC
test -z "${LC_PAPER+x}" || export LC_PAPER
test -z "${LC_TELEPHONE+x}" || export LC_TELEPHONE
test -z "${LC_TIME+x}" || export LC_TIME
test -z "${LOCPATH+x}" || export LOCPATH
fi
if test -r /etc/profile; then
. /etc/profile
fi
이걸 적용했더니, 녹색화면에서 검은화면까지는 떴지만 아무 것도 할 수 없었다.
xrdp를 리셋하고 다시 접속했는데
이번에는 로긴은 가능하지만 녹핵화면이다.
이것저것 했더니 잘 나온다.
해상도가 커서 해상도 설정을 해보도록 해야겠다.
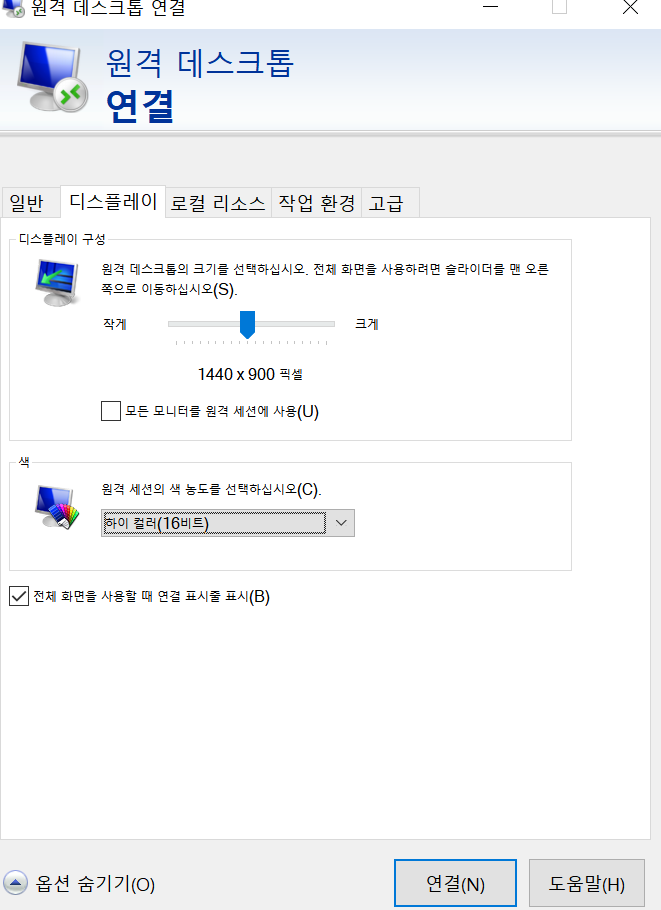
옵션을 켜면, 해상도 등의 설정이 가능해진다.
여기까지 일단하겠는데, 한글입력 설정은 따로 적어보도록 하겠다.
관련자료
-
이전
-
다음


